Showing posts with label decor. Show all posts

10/15/14

Fall-ing in LOVE with Fall

Hi readers!

So it's about that time. The time for boots, scarves, sweaters, pumpkin spice lattes, and cool weather, right? Wrong! If you live in Miami that is. Even though the last couple of days we have gotten some cooler weather- cooler as in not 100 degrees.

Check out our 5 day forecast, thanks to weather.com:

However, I am still determined to feel Fall in Miami. So, yes, I go to work in my cardigans, and scarves, and pray and hope to not have to be outside, at all.

In order to help me get into the season's spirit, I made these printable chalkboards and gave one to one of my coworkers to put on her door. {see below}


 I did the same with mine. Check them out:


I then quickly decided to make them available to you. So, yep, that's right, click below to download.


Send me pictures of how you used yours, and with your permission, I can post them up. Enjoy!

9/15/14

Inspire.

Hi all-

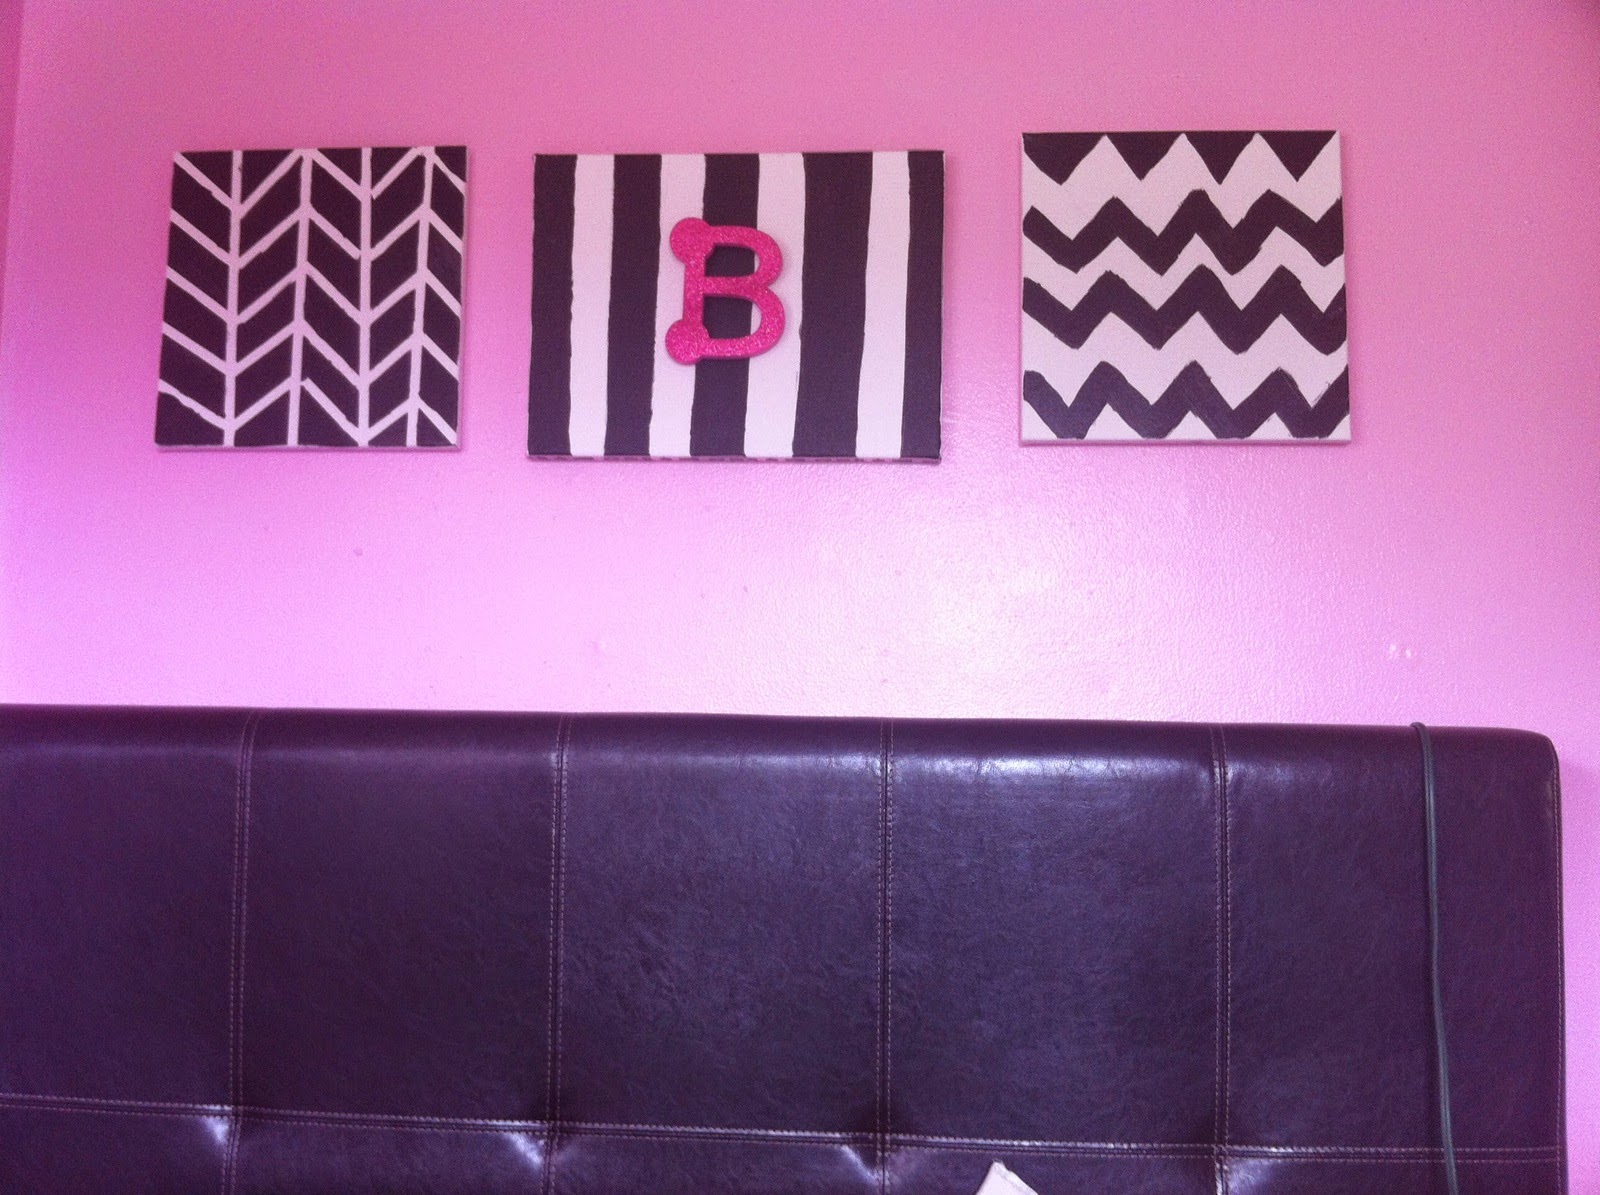
So here is what I have been thinking about all day. Inspiration. As human beings, we constantly have the thought going through our heads of "Why am I here?" "What is my purpose?" or "Will I make a difference?" For me, it has always been very important that I make a difference in the lives of the people around me. I think this is the reason God led me to teach. I feel very blessed every day to be able to come to my classroom and touch the lives of the students that come in and our of my classroom every year. This then also leads me to another thought. Legacy. In order to really leave an imprint on the world, we must take a second to look at the legacy we are leaving behind. Not just our reputation, but also our affect on those around us, and how we've inspired them to do something to benefit the world {or not}. This takes me back to inspiration. Over the weekend, one of my students surprised me by emailing me a picture of something I inspired her to do. {pictured below} It got me thinking. The students in my class, your coworkers, or people you run into on the train, at the red light, or at the coffee store. They all are impacted, or inspired, by you. How are you inspiring others? Remember, smiles really ARE contagious, and a random act of kindness DOES bring beauty to the world.


The DIY steps for this are pretty simple and they are a GREAT way to spruce up any wall, whatever room in the house that wall might be in.

First- You need some canvases {You choose! This specific example was made with two 12x12's and one 12x16}.
Second- You need painter's tape, however, if the struggle is real, scotch tape will do
Third- Decide what colors you want {She chose white and black which made it so much easier for her}
Fourth- {If you are choosing a color other than white, this would be the step to paint and let dry, but once you let dry the rest of the steps, are the same} You get to choose whatever designs you want, laying the tape however you think fits your style best
{Remember wherever you lay the tape, that part will not be painted by your next coat of paint}
Fifth- You paint over the whole canvas and set aside to dry {Yes, even the parts that you covered with tape}
Last- Peel up the tape and Voila! you have your design

Try it out and let me know how it goes!

6/23/14

Tissue Paper Garland


These little garlands are all the rage at the kid's parties, and some of us have spent so much of our time finding the right ones with the right colors. Here is where all the searching stops! Although they will be available on my store soon, you don't need to purchase them from anyone after this quick step by step.

First things first, what will you need? Well you need to determine how many tassles you want to make and what colors? In this case, we made 6 for the studio {2 pink, 2 black, & 2 white}. You are going to need a sheet of tissue paper for each. These sheets are Spritz brand and they are 16 1/2" x 24" {41.9 cm x 60.9 cm}. Spritz is available in the party section of any Target. You are also going to need string, scissors, and I love any opportunity to use Washi Tape, and this is one of those very opportunities.


You need to separate the tissue paper into individual pieces. You will then cut it down the middle {vertically} and then layer the two pieces, fold in half one way and then the other way.


Do you remember making fans in elementary out of paper? Well that same back and forth fold that you used then, you will use now. As seen below.

Then you are going to need to cut slits into your little folded tissue paper. I cut along the folds and then again in the middle. Keeping it folded, so that I don't need to cut so many individual slits. Each slit, leaving about 1 1/2" from the top of the paper. {Tip: For this step you need some really strong, sharp, new, good scissors.}


Then, it is very important that you separate {carefully} the strips you just cut. Be very careful. You want to completely separate them, and open up your tissue paper, like below.


You are now going to refold it. This step is important because it will give your tassel volume. {If only our hair were this easy, lol} Remember that back and forth fold we did earlier? Well do that again, with this larger piece of tissue paper. So that you get something like this below.


Then you are going to fold it in half over your string and wrap Washi Tape around it.


This is important so that wherever you place your tassel you can move it later! See?


Let me know how this works for you? I tries to simplify as much as possible, but if you are still having some trouble, you can contact me about purchasing a custom one. Thanks!


4/11/14

Freebie Fridays

{Be My Guest}

Hi loves...

I am in a spectacular GREAT mood this morning... And I have some beyond exciting news! Besides all the other awesome stuff that we are being blessed with this year. My hubs and I will be moving into our first home together soon! OMG! I cannot wait. So many exciting opportunities for decor, and DIY.

That out of the way, now you know the reason I made these little goodies. I am sharing them as downloadable images so that you can print them in any size that you want. You can even send them to your local photo printing shop and get it in a high-res photo look.

I made these four images for our future guest bedroom. {Yes, I am a huge Disney fan... guilty!}


Download all individually here:


4/4/14

{Good Morning}

Hey readers!

A little room decor for you. These below were a custom make for a customer, but I decided to make some other variations of this and post them here for all of you!


Here are the two I made for my lovely followers. There is a green version of the purple one, and there is an entirely new blue one.
- If You Fancy Blue -                                     - If Green Is Your Thing -

Hope you enjoy!
Take pictures of your finished products and send them my way!
XOXO,
Crystal

Search This Blog